
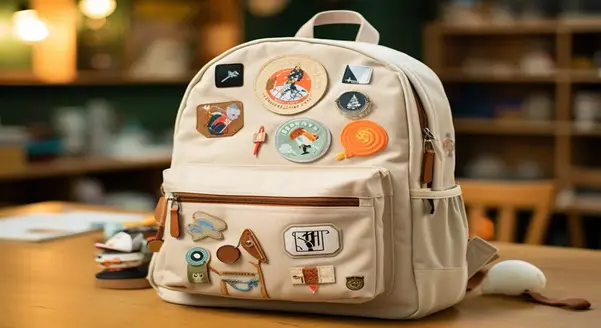
How to Turn a Standard Backpack into a Unique Statement?
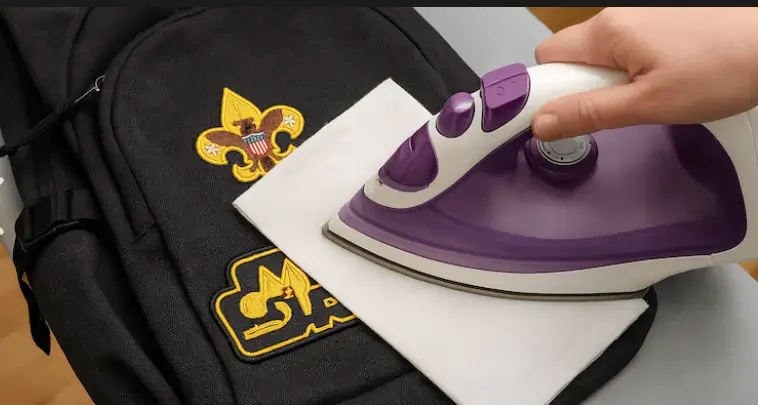
Prepared to make your bag fashionable by applying iron-on patches? Choose your favorite places, set your iron to a medium heat setting, and press down firmly using a piece of cloth for protection until the glue is spread thoroughly.
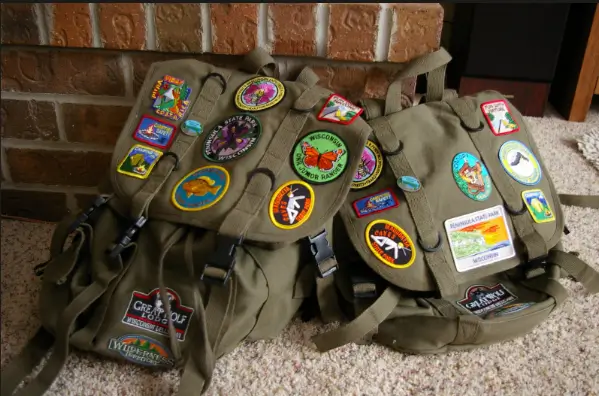
Display Your Creative Vision On Backpacks With Iron-On Patches
Whether you’re in a busy morning commute or traveling for the weekend, your backpack accompanies you everywhere. However, let’s face it, if you enter a room and see three other people with the same mass-produced bag, it’s a style killer.
What’s the point of a boring, uniform appearance when you can easily transform your everyday bag into a beautiful, individual piece of art?
There is no need to be a design genius or to spend hours doing intricate textile crafting to transform your plain rucksack. With vibrant patches, you can transform the whole appearance of your canvas or denim tote bags in a few minutes.
The secret to getting the best results is knowing just how to prepare the fabric, deal with the heat, and take care of the bag so that your personal artwork remains in place during all the rainy seasons and heavy loads.
Jump right into the hands-on, doable experience of making your dull pack into a wearable canvas.
Understand The Seamless Fusion Process
The fun is when you get to place your patches. Place the backpack on a firm surface such as a wooden dining table or a marble countertop surface, not a soft, heavily padded ironing board.
Organize your collection until the arrangement is ideal, leaving at least ½ inch of breathing room between heavy seams, sturdy zippers, and moving structural straps.
If you’re ready to melt the adhesive, keep in mind that standard directions may not mention the special curves that a bag might have inside.
It is extremely useful to follow a guide on how to apply Iron-On Patches: quick & easy method to avoid common burning mistakes, for the best results.
Your iron should be set to high cotton and the steam completely off. Place a thin kitchen towel over the prepared composition, apply a heavy and even downward force for 30 seconds, and allow the adhesive to cool while it remains flat without shifting an inch.
Get A Better Grip On Your Canvas
Carefully consider your bag’s material before you even turn on your heating tools. The best materials for this project are heavy cotton canvas, denim, and durable polyester, since they can endure high temperatures without wrinkling or melting.
If your bag has a slippery, waterproof exterior, look at the care tag first and follow the instructions carefully to avoid iron burn or fabric damage.
After making sure the fabric is safe, wash the bag to remove dust, oils, or the invisible waterproof factory finishes. Clean the target panels with a damp cloth and mild soap, and allow the whole pack of panels to air dry completely.
Once dry, iron the flat areas with a warm iron to remove any stubborn folds from the fabric, and as a result, you’ll have a fresh and perfect surface for designing your next layout.
Protect Embroidery From Daily Wear
Your backpack is constantly flexing when you’re traveling on trains, buses, or when you’re on foot in busy streets. This constant rubbing can cause the stitching on your badges to become worn and the outer threads to fray.
If you’re laying down your pack, avoid scratching it against rough brick walls or concrete floors to avoid this kind of damage.
Having your bag on a flat surface helps to keep your embroidery clean, shiny, and totally free of unwanted tears.
Discover Premium Local Patch Designs
The most satisfying part of the entire customisation project is to find the right patches to tell the story. Basic shapes can be found in combinations that have been mass-produced online, but they are often not as unique when stitched or glued.
Locally, you will be able to get embroideries that are thick and dense, which will look good and not fray if you accidentally scratch them against a brick wall or a school locker.
Whether you’re looking to support local creators or find something different from all the other bags, searching for custom embroidered iron on patches near me will help you discover hidden design studios and specialised textile print shops in your local area.
Local artists are available to turn your drawings, designs, or club logos into patches that can be ironed onto a backpack.
Balance Weight For Maximum Fabric Comfort
Patches are distributed throughout the various pockets of the rucksack, not in one place.
Heavy pieces of embroidery on a single pocket may weaken and distort over time. Distributing contents into side pockets, front pouch, and onto the main top lid balances the bag and decreases the tension on the fibers of the fabric.
The clever design means that the pack is also comfortable to wear on long hikes.
Find The Solution To Difficult Interior Angles
Backpacks have deep pockets and compartments inside, along with hidden lining pockets, making it difficult to obtain a nice flat surface for ironing.
The solution to this is to roll a small hand towel or two thick socks up and stuff them directly in the bag, behind the panel you are customising. This inbuilt packing forms a reliable, solid support which exerts a pressure against the iron. It gives you good downward pressure to completely melt the glue.
Modify Your Style And Fix Mistakes
One patch layout that you may have loved a year ago may not be the one you love today.
The best thing about the modern heat-activated glues is that they are not permanent, if you know the right ways to remove them. You don’t need to keep the same style with your backpack for a long time or discard a cool backpack because it seems to be out of style.
When the time comes to change a logo for a new one, you can easily remove Iron-On Patches without damaging fabric with the right amount of heat applied in the right spots.
Reheating the area with a dry iron melts the glue of the underlying area, which makes it easy to peel off the patches with a pair of tweezers. If there is any sticky residue left over, it can be removed with a very small amount of rubbing alcohol applied to a microfibre cloth to give you a clean surface upon which to personalise again.
Valuable Tips For Smooth Application
May I use an iron on a nylon or water-resistant backpack?
It is not generally safe, as nylon can melt easily under high heat. For a synthetic bag, you can use a warm iron, but be sure to place a thick cloth down, or you can avoid the heat altogether and join your design with permanent fabric glue or by simply hand-stitching around the edges.
If the corners of my patch begin to lift, what should I do?
Corners can easily be lifted. Cover the free part with a piece of baking paper and iron with a hot, dry iron for 10 seconds. This reheats the original glue, thereby setting it back for the bond in the fabric weave.
Is it necessary to sew around the edges after ironing them down?
Sewing is not required but can be useful as a form of protection against wear and tear, such as on the bottom panel or joints in straps. Use a matching needle and thread to run the edges of the patches with quick stitches to keep the patches from falling out, even during your toughest commutes.
What is the safest way to remove the glue from a customised backpack?
Hand wash your modified bag with mild soap, a soft brush, and cold water. Do not leave it completely wet for long periods of time, and do not place it in a clothes dryer, as machine heat will melt the adhesive and cause peeling.
Will the adhesive leave a mark if I take the badge off later?
Most good-quality adhesives will melt cleanly when they are reheated for removal. If there is any leftover sticky material on the fabric, this can be easily dissolved and cleaned up with a clean cloth saturated in common household rubbing alcohol.
Conclusion
To summarise, personalising your backpack with heat-activated patches is a fast, inexpensive, and extremely satisfying way to give your everyday pack a bit of a lift.
Opting for a sturdy canvas or polyester foundation and preparing the fabric and dry heating ensure a bond that stays strong over time and through continued use.
Gentle spot cleaning and air drying ensure that embroidery colours remain bright and edges are flat against the panels.
Best of all, as these patches can be safely removed and replaced in the future, your backpack can grow with you as your tastes and passions change.

As a fashion designer at Iron On Patches UK, I help businesses and people create custom iron-on patches. I help them with what I know about designing patches and what materials to use. I also talk about how to apply patches to different things and what’s popular in the patch world. My goal with the Iron-On Patches UK blog is to help people make premium patches that show their unique identity and how these patches can be a part of their brand. The Iron-On Patches UK blog is here to make it easy for people to customize their patches.