
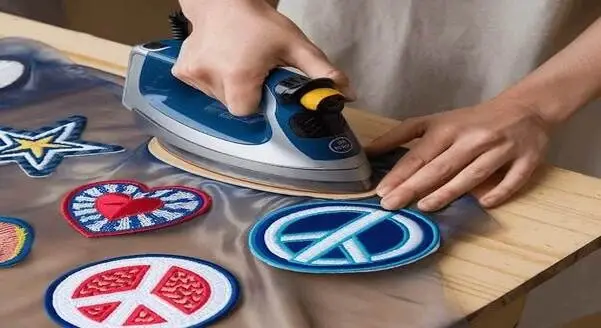
How to Turn Old Clothes into New with Iron-On Patches
That shirt with the coffee stain on the pocket. The jeans with a small tear at the knee. The jacket sleeve that’s starting to fray at the cuff. None of these is ruined. They’re just waiting for a fix. Iron-on patches solve exactly this kind of problem, and they do it faster than sewing, mending, or replacing the piece altogether.
This isn’t just a repair trick either. A well-placed patch can turn a worn-out garment into something you’d actually choose to wear again. This guide walks through where patches work best, how to apply them properly, and what to do when one starts to lift.
The Best Spots to Apply a Patch to a Clothing Item
Some parts of a garment wear out faster than others, and that’s exactly where a patch does the most good.
Common trouble spots
Knees, elbows, and pockets take the most friction, so they’re usually the first to develop holes or thin patches of fabric. Cuffs and collars wear down from constant rubbing, too, and a patch here can cover fraying before it spreads further.
Fabric that works
Cotton, denim, and canvas hold heat well and let the adhesive bond properly, which is why these fabrics respond best to ironing on a patch. Silk, nylon, and other synthetic or waterproof materials don’t hold up the same way. The heat either damages the fabric or the patch just won’t stick long enough to matter.
Picking a Patch That Actually Matches Your Style
Once you know where the patch is going, the next decision is what kind of patch to use. This is where most of the personality of the project comes in.
Pre-made patches: Craft stores and online shops sell ready-made patches in almost every design imaginable, from simple logos to floral embroidery. These work well if you want something quick and don’t need an exact match to your outfit or theme.
Going custom: If you have a specific design in mind, or you need several identical patches for matching jackets or uniforms, working with an iron-on patches maker gives you more control over size, colour, and detail than anything off the shelf. Custom orders take a bit longer, but they’re worth it when the design actually matters to you.
A few things worth checking before you order or buy:
- Patch backing should be heat-activated, not just glue-based
- Size should suit the spot you picked earlier, not the other way around
- Embroidered patches hold up better on rougher fabric like denim, while printed ones work fine on smoother cotton
The Right Way to Apply It
Getting the placement and patch sorted is half the job. The rest comes down to heat, pressure, and patience.
Set up first
Lay the garment flat on an ironing board and place the patch exactly where you want it. Cover it with a thin cotton cloth so direct heat doesn’t scorch the fabric or melt the patch’s edges.
Apply heat and pressure
Set the iron to a high, dry setting (no steam) and press down firmly for about 20 to 30 seconds. Don’t slide the iron around. Just hold it in place. Flip the garment and press the same spot from the inside for another 15 seconds to lock the adhesive from both sides.
Let it cool before you move it
Give the patch a few minutes to cool completely before wearing or folding the garment. Moving it too soon can shift the patch before the glue fully sets.
Fixing a Loose Patch
Try the iron first
If a corner or edge starts lifting, the simplest fix is to re-iron it. Place the thin cloth back over the patch, apply the same heat setting as before, and press down for 15 to 20 seconds on the loose section. This reactivates the adhesive and often solves the problem completely.
Add stitching for backup
If the same spot keeps lifting after a re-iron, sew around the edges with a needle and thread that match the patch color. This gives it a second layer of hold that heat alone can’t provide, especially on patches that get a lot of movement or friction.
Use fabric glue as a last resort
When you want to fix a peeling iron-on patch and stitching isn’t an option, a small amount of fabric glue along the lifted edge works as a quick patch-up. Press it flat and let it dry fully before wearing the garment again.
DIY Ideas to Make Old Clothes Feel New
Patches don’t have to sit alone on a garment. A few small combinations can turn a basic repair into something that actually looks designed.
Mix patch sizes on one piece:
Instead of a single patch, try pairing a small one with a slightly larger one nearby, like on a jacket pocket or sleeve. This works especially well on denim jackets, where a cluster of two or three patches near the chest or back looks intentional rather than patched together as an afterthought.
Pair patches with visible stitching:
Sewing a simple running stitch or cross-stitch border around the edge of a patch adds texture and makes the repair look deliberate rather than hidden. Contrasting thread colors work particularly well on plain denim or canvas.
Cover worn cuffs and collars:
Frayed cuffs on jackets or shirts are often written off as unfixable, but a patch sewn or ironed directly over the worn section extends the life of the garment. Choose a slightly larger patch than the damaged area so the frayed edge is fully covered.
Quick Fabric Settings Guide
Different fabrics need different heat levels, and getting this wrong is one of the main reasons patches fail to bond properly. Use this as a quick check before you plug in the iron.
| Fabric Type | Iron Setting | Press Time |
| Cotton | High | 20–25 sec |
| Denim | High | 25–30 sec |
| Canvas | Medium-High | 20 sec |
| Polyester Blend | Medium | 15 sec |
| Silk / Nylon | Not suitable | — |
Cotton and denim can take the most heat, which is why patches bond so well on jeans and jackets. Canvas needs slightly less time since it’s thinner and heats up faster. Polyester blends need a lower setting to avoid scorching or warping the material. Silk and nylon simply aren’t built for this kind of heat, so an iron-on patch isn’t the right fix for those fabrics.
Why Patches Come Loose
Even a well-applied patch won’t stay perfect forever, and washing is usually the reason why.
Regular washing is hard on iron-on patches because the constant tumbling and friction inside a washing machine slowly work at the edges of the adhesive. Hot water speeds this up further by softening the glue layer more than it should. Dryers make it worse, since high heat combined with tumbling puts even more strain on the bond over time. Detergent plays a role too. Some formulas leave a residue that builds up along the patch edges, which weakens the grip over several wash cycles. None of this means the patch is defective. It’s just normal wear that happens with regular use and washing.
Quick Answers Before You Start
Is it better to glue or iron on patches?
Ironing creates a stronger, more even bond for most fabrics since heat activates the adhesive fully. Fabric glue works as a backup or quick fix, but it’s less durable long-term and better suited for delicate fabrics that can’t handle direct heat.
Do I need water in my iron to iron on patches?
No, steam actually weakens the adhesive layer during application. Keep the iron on a dry setting and use a damp cloth over the patch instead. This gives you controlled moisture without softening the glue too early.
How to transform old clothes into new ones?
Iron-on patches are one of the fastest ways, but pairing them with visible stitching, covering worn cuffs, or mixing patch sizes on one garment adds more character and makes the update look intentional rather than just repaired.
How to turn fabric into iron-on patches?
You’ll need fabric, a fusible adhesive backing sheet, and scissors to cut your design to size. Iron the adhesive onto the fabric first, then trim and apply it to the garment the same way as a store-bought patch.
It Is Worth the Effort!
A patch costs a fraction of a new garment and takes less than ten minutes to apply, yet it can add months or years to something you’d otherwise set aside. The right placement, the right fabric match, and a little care during washing are all it takes to keep the result looking clean. Whether it’s covering a stain, hiding a tear, or just adding some character to an old jacket, this is one of the simplest ways to get more wear out of what you already own.

As a fashion designer at Iron On Patches UK, I help businesses and people create custom iron-on patches. I help them with what I know about designing patches and what materials to use. I also talk about how to apply patches to different things and what’s popular in the patch world. My goal with the Iron-On Patches UK blog is to help people make premium patches that show their unique identity and how these patches can be a part of their brand. The Iron-On Patches UK blog is here to make it easy for people to customize their patches.