
How to Make Iron-On Patches Last Longer and Look Better
Worried that your favorite patches won’t stick anymore? Use an iron on high heat during installation time, turn the clothes inside out during washing, and avoid using the heating option in the dryer.
Securing the Ultimate Permanent Hold of Iron-On Patches
You press it down, see it slide in, and then you’re in love with its appearance.
However, when it’s time for the first wash, the edges of your favorite patch design begin to curl up like old garbage. When the heat-activated glue lets go, there’s nothing worse than losing a beautiful custom patch.
Standardising team uniforms or tailoring your own look is challenging enough, but getting those designs to adhere to the fibres is even tougher.
It isn’t a matter of buying magical glue; it’s simply about learning how to prepare, apply, and wash your patches so that they don’t fall off.
If you’re looking for custom designs that will last for decades without dropping out of your laundry, you need to have a smart approach. Let’s take a look at simple and practical steps that make a temporary design a permanent feature of a wardrobe.
Begin With A Flawless Preparation Routine
The process to a permanent bond starts before the time you plug in your home iron.
What many people do wrong is to put a patch on a brand new garment straight out of the box. New clothing is sometimes treated with chemical finishes, starches, or factory oils that create a barrier between the glue and the threads on the clothes.
Make sure that your clothes are washed and completely dry before beginning your project. To learn this process easily, read the complete guide to Iron-On patches for the best match with fabric types and application techniques.
Clean The Apparel Using Extreme Care
Even if you do the perfect heat application, you can still ruin it with aggressive laundry habits.
Imagine your patch adhesive as a heat-sensitive layer: during the wash cycle, high temperatures will melt the adhesive again. Turn clothes inside out before washing them in the washing machine.
This is a basic precaution that protects the embroidery surface from scratch against any rough zippers, buttons, and weighty denim products in the drum.
Use the gentle cycle of the washing machine and cold water only. Don’t use harsh chemical detergents, stain removers, or liquid chlorine bleach, because these will damage the chemical makeup of the glue, and your patch will fall off after some time.
Keep Patches Away From The Heat Of The Dryer
The biggest enemy of iron-on backings is the modern clothes dryer.
The tumbling action and high level of dry heat reactivate the glue and pull the corners of your patches out of the swirling fabric. The best option to prolong the life of your clothing is to air dry it. Hang clothes on a sturdy hanger or on a drying rack in the house. Avoid putting drying items in direct sunlight, especially in intense UV rays, because the adhesive backing can be harmed, causing your gorgeous embroidery colours to fade.
Use Perfect Pressure & Heat
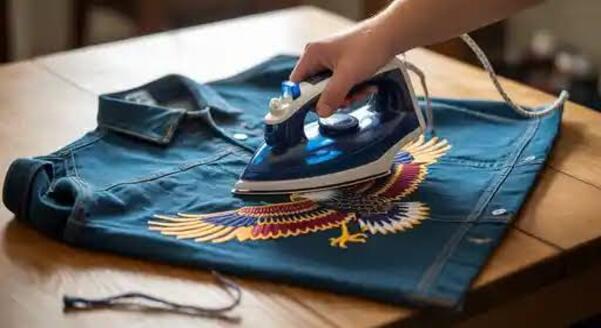
The main problem with most DIY projects is getting the temperature right. If your iron is cold, the glue will be hard, and if it is too hot, the embroidery will scorch and damage the clothing.
Use a medium-high setting on your iron, and make sure to disable the steam feature. Water vapour neutralises the glue and prevents it from sticking.
If you are handling branded corporate apparel, it is crucial to select custom Iron-On patches for business branding that can be relied upon to maintain the professional appearance of your uniforms even after a long day’s work.
Put it on a hard, solid surface such as a wooden table or a flat countertop, not a very padded ironing board, which goes down with you.
Put a thin piece of cotton fabric or a clean pillowcase over the design so that the threads won’t be exposed directly to heat. Apply even pressure without rocking or sliding the iron for 25 seconds.
Reinforce The Patch Edges With Quick Stitches
In heavy-use items such as work uniforms, active sportswear, or children’s backpacks, heat alone may fail over time, especially when these items are constantly stretched and bent.
The last line of defense against wardrobe insurance trouble is a few straight stitches around the edge. It is not necessary to be a master seamstress or to own a high-dollar sewing machine to do this!
Hold a needle and a piece of matching coloured thread that fits in with the edge of the design. Do a fast running stitch or a tight backstitch all around the edge.
The physical barrier to the edges is tight, so even if the glue melts a little in the event of a warm wash, the patch will not fall off the clothing.
Remove Air Pockets & Secure Lifting Borders Quickly
Sometimes the edges of thick embroidery may lift even after pressing if the iron is not applied evenly. Do not use fingernails to scrape around the edges of the minor gap after cooling, as it will only cause damage.
Rather, place a piece of scrap paper just over the portion of the loose corner, and press firmly and specifically for 12 seconds using the very tip of your dry iron.
This way, you’ll focus heat precisely on the spot where the glue didn’t melt, pressing the pocket without damaging the whole garment and increasing the longevity of the patch.
Let It Cool Down And Flip The Fabric
Let your initial press rest for at least two minutes once it has been made.
At this point, the glue is still a hot liquid, and if the fabric is moved prematurely, the forming connections will be broken. Once the area is cool, fold the clothing inside out.
This is one fundamental application tip that is frequently overlooked. Apply dry iron to the back of the fabric directly behind the patch for 15-30 seconds. This pulls the melted glue through the fibers from the back, forming a strong lock.
The double-sided heating application of custom Iron on patches UK guarantees that the designs on your local school, club, or corporate patches stay in good condition and have a retail-quality finish, even when exposed to harsh weather conditions.
Do not hang the garment until it has completely cooled.
Common Inquiries and Expert Maintenance Tips
Is it possible to re-iron a fallen patch?
Yes, you can easily rescue a lifting edge. Cover design with a thin protective cloth and press with a hot, dry iron for about 15 seconds. This reheats and revives the original glue, allowing the glue to be pressed into the fabric threads securely.
Can fabric glue be used as an additional security measure?
If a corner will not remain in place, use fabric glue to hold it down as an alternative. Apply a small drop of permanent fabric adhesive directly under the loose edge, flatten with fingers, and allow to dry thoroughly for 24 hours before putting on.
Which materials do not work well for iron-on patches?
Avoid any fine silk, stretchy spandex, rainproof synthetic finishes, or true leather. The materials melt immediately when exposed to high iron temperatures, or the hot glue doesn’t stick to the smooth surface.
How long do iron-on patches last?
The longevity of the iron-on patch depends on the quality of the patch, its proper application, and how well you take care of the clothes. If used right, they will be durable enough to last you several years. Stitching the edges and reducing heat when washing will help prolong their life even more.
Do I need to clean my new jacket before I can put a patch on it?
Absolutely. Chemical starches and stiffening oils are applied during the manufacture of new garments to ensure their good appearance on the store counter. By cleaning the surface of the garment by washing first, these barriers are removed, and the glue can adhere to clean threads.
Conclusion
To sum up, the long-lasting iron-on patches are about patience, correct heat levels, and gentle laundry management.
With a clean, unblemished fabric base, without the steam from an iron and the inside-out double-heating process, you provide the adhesive with the absolute chance to spread evenly into the fabric threads.
Stitching a quick reinforcement around the outside edge using needle and thread ensures that the edge will always be in place even under normal use.
These simple and handy tips will help you keep your patches securely attached to your favourite garments for a long time.

As a fashion designer at Iron On Patches UK, I help businesses and people create custom iron-on patches. I help them with what I know about designing patches and what materials to use. I also talk about how to apply patches to different things and what’s popular in the patch world. My goal with the Iron-On Patches UK blog is to help people make premium patches that show their unique identity and how these patches can be a part of their brand. The Iron-On Patches UK blog is here to make it easy for people to customize their patches.