
The Complete Guide to Iron-On Patches: How to Apply, Remove, and Make Them Last Longer
A patch can completely change the look of a jacket, backpack, hoodie, or pair of jeans in just a few minutes.
That’s one reason iron-on patches have remained popular for decades. They offer a simple way to personalise clothing without requiring sewing skills or specialist equipment. Whether someone wants to display a favourite hobby, represent a club, promote a brand, or repair worn fabric, iron-on patches provide a practical solution.
However, applying a patch successfully involves more than placing it on a garment and pressing an iron on top. The wrong temperature or poor aftercare can cause patches to wrinkle or peel sooner than expected.
So if you’re investing in custom iron-on patches, continue reading to know how you can apply and maintain them properly to make a significant difference to their lifespan.
What Are Iron-On Patches?
An iron-on patch is a decorative or functional patch that comes with a heat-activated adhesive backing.
When heat and pressure are applied, the adhesive melts and bonds to the fabric beneath it.
Iron-on versions do not require stitching during the initial application process, unlike sew-on patches. This convenience makes them particularly appealing to people who want a quick upgrade without reaching for a needle and thread.
Iron-on patches are commonly used for:
- Fashion customization
- School uniforms
- Sports teams
- Corporate branding
- Motorcycle clubs
- Military-inspired apparel
- Repairing damaged clothing
An exciting fact is that modern patches come in a wide range of materials, including embroidered, woven, printed, chenille, PVC, and leather-style designs.
The patch itself may vary, but the heat-activated backing remains the key feature.
Why Are They Popular in the UK?
Walk through any high street, music festival, sporting event, or university campus, and you’ll likely spot patches on clothing and bags.
The point is, a patch is everywhere. Part of their popularity comes from practicality.
- An Affordable Alternative
Replacing an entire garment because of a small tear rarely makes financial sense. A well-placed patch can extend the life of clothing while adding character at the same time!
- The DIY Fashion
Fashion trends have also played a role. Any ultimate guide to custom iron-on patches in the UK highlights how these emblems allow individuals to create unique pieces without investing in expensive custom clothing.
- Leading The Professional World
Businesses and organisations have embraced them as well.
Custom patches offer a durable way to display team identities and promotional designs on uniforms and merchandise.
In many cases, they even create a more premium appearance than direct printing techniques!
- A Refreshment Of Memories
There’s nostalgia baked in, too. A huge number of people in the UK grew up earning scout or sports badges that their parents ironed on at the kitchen table. Patches carry that memory.
They feel familiar in a way that other personalisation trends don’t.
How to Apply Them Correctly
The difference between a patch that lasts for years and one that peels after a few washes often comes down to the application process.
You need to check whether the garment can safely tolerate heat before applying the patch. Some synthetic fabrics may become damaged under high temperatures.
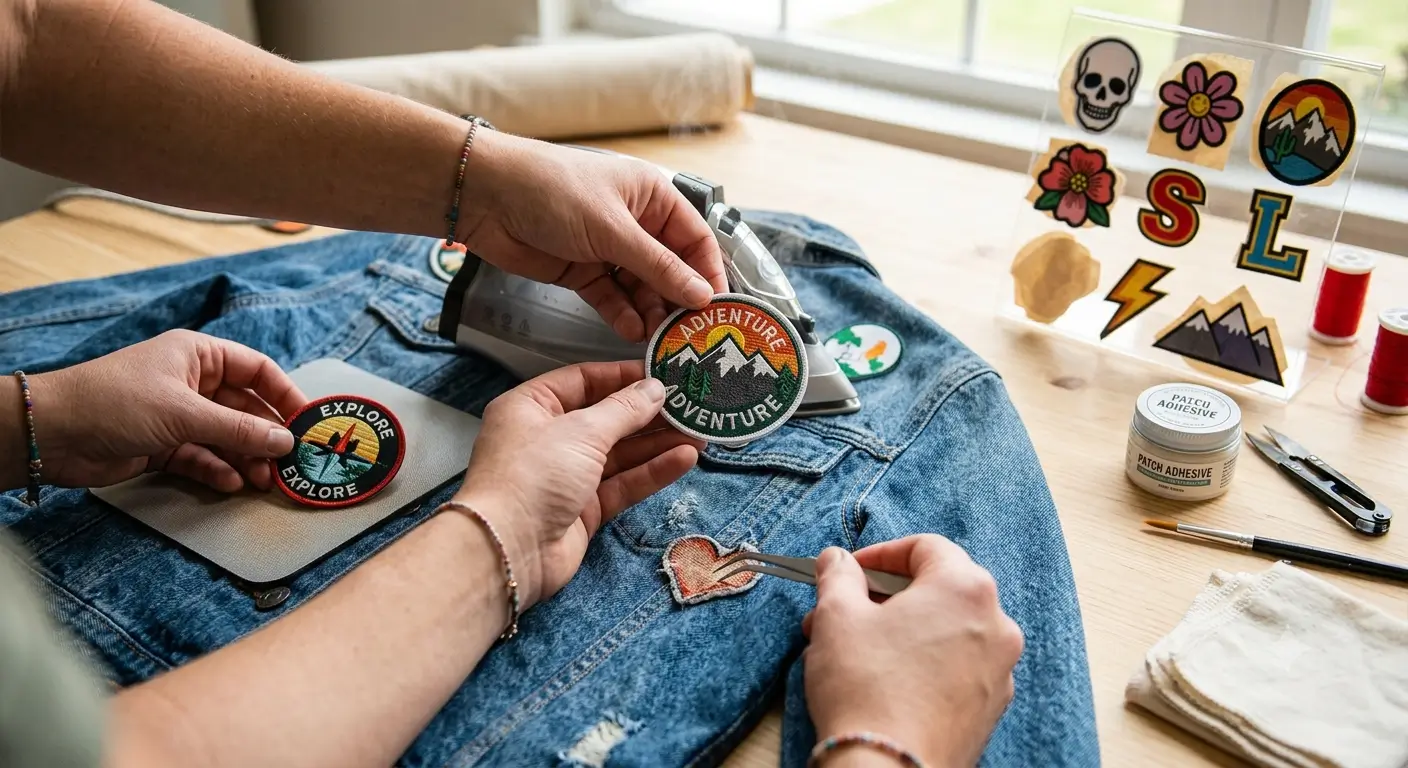
To Apply Iron-On Patches: Quick & Easy Method follows these steps:
1) Prepare the Garment
➢ Lay the garment on a flat, heat-resistant surface
➢ Remove wrinkles by ironing the area first
A smooth surface allows the adhesive to bond more evenly
2) Position the Patch
➢ Place the patch exactly where you want it
➢ Once the adhesive activates, repositioning becomes much more difficult
3) Apply Heat and Pressure
➢ Cover the patch with a thin cloth or a pressing sheet
➢ Press the iron firmly onto the patch rather than moving it around continuously
➢ Most manufacturers recommend holding pressure for 20 to 30 seconds
4) Allow It to Cool
➢ Resist the temptation to test the edges immediately
➢ Allow the patch to cool fully before checking the bond
This cooling period helps the adhesive set properly
Common Mistakes to Avoid
Most of the time, patch failures occur because of simple mistakes rather than poor-quality products.
Some of the most frequent issues include:
| Mistake | What Happens |
| Using low heat | The adhesive doesn’t activate properly |
| Applying on uneven surfaces | Weak bonding around edges |
| Skipping pre-ironing | Wrinkles create air gaps |
| Washing too soon | The adhesive may loosen before full setting |
| Using steam during application | Excess moisture interferes with bonding |
Another mistake involves rushing the process.
People often focus on heat while forgetting that pressure is equally important. It is commonly seen that a hot iron placed lightly on a patch struggles to create a strong bond.
How to Remove Patches Safely
There will be a time when you will want to say bye to your favourite patch.
A uniform may require updating, or your personal preferences may have changed over time.
Fortunately, you can remove iron-on patches without damaging fabric if the process is handled carefully!
The goal is to soften the adhesive again.
A common method involves:
- Heating the patch with an iron
- Gently lifting one corner
- Slowly peeling the patch away
- Removing any remaining adhesive residue
Patience matters here as pulling too aggressively can damage fibres or leave visible marks behind.
If you are stuck with stubborn adhesive residue, fabric-safe adhesive removers can help clean the surface after removal.
Washing and Care Tips
You might have applied the patch perfectly. The happy feeling will take over. But within a few hours, it could leave you disappointed by falling off!
The reason? You neglected the aftercare that was recommended for the first 24 hours.
Remember, you should never wash the garment immediately, as it gives the adhesive time to cure and create a stronger bond.
When you apply iron on patches for a strong and clean finish, a few simple habits can extend patch life considerably:
- Wash garments inside out
- Use cold or warm water instead of hot water
- Select gentle wash cycles where possible
- Avoid harsh bleaching products
- Air dry when practical
Heat exposure from tumble dryers is often overlooked. Repeated high-temperature drying can weaken the adhesive over time.
How to Fix Peeling Patches
Even well-applied patches occasionally develop lifting edges. But remember, minor peeling doesn’t always mean that your patch is screaming “replace me”.
It is just demanding a little bit of extra care from you.
If only a small section has lifted:
- Clean the area beneath the edge
- Reposition the patch carefully
- Cover it with a pressing cloth
- Reapply heat and pressure
These fix a peeling iron-on patch simple solutions restore the bond successfully in most of the cases.
If an old patch is giving you a hard time, a fabric adhesive can provide additional reinforcement.
Some people also add a few stitches around the border for extra security, as this approach combines the convenience of iron-on backing with the durability of sewing.
Best Fabrics for Iron-On Patches
Some fabrics create stronger, longer-lasting bonds with heat-applied patches.
The best candidates for your patch selection typically include:
| Fabric | Suitability |
| Cotton, Denim, Canvas | Excellent |
| Cotton blends | A good choice |
| Polyester blends | Usually suitable |
| Nylon | Often unsuitable |
| Silk | Not recommended |
| Leather | Requires specialised methods |
Denim remains one of the most popular choices for patch lovers due to its durability and heat resistance.
If you’re unsure about a fabric, testing a small hidden area first can prevent costly mistakes.
Why Custom Iron-On Patches Are Trending
The growing popularity of custom iron-on patches isn’t difficult to understand. People increasingly want products that feel personal.
Walk into any craft shop, and you’ll find the usual, boring items. They’re fine. But they’re not the reason patch culture has exploded recently.
The real shift is custom patches. Online suppliers now produce small runs, sometimes as few as ten or twenty, at prices that make sense for individuals, not just big brands.
Someone who wants to put iron-on patches on backpacks or even wants a podcast logo can have it made and delivered within a week.
Who’s actually ordering them:
- Small Businesses
Handing them out as branded merchandise that people actually keep and wear, unlike a pen or a tote bag full of other branded pens.
- Bands and Artists
Selling them at gigs as low-cost merch that travels easily and doesn’t need a printer or a van full of stock.
- Grassroots Sports Clubs
Kit badges and tournament awards that look professional without the cost of fully embroidered kits.
- Schools and Youth Groups
Achievement patches that kids genuinely want to wear, not stick in a drawer.
- Individuals
Just personalising things they own, because they can. It’s one of those trends that looks like it came from nowhere but actually makes complete sense once you think about it. People want things that feel like theirs. A custom patch, ironed onto a jacket they already love, does that better than most alternatives.
Common Queries Answered
-
Can iron-on patches be applied without an iron?
Yes. Many people use a heat press, which often provides more consistent pressure and temperature than a household iron.
-
How long should I wait before washing a newly applied patch?
Waiting at least 24 hours is generally recommended to allow the adhesive to fully set on your newly applied iron-on patches.
-
Are iron-on patches permanent?
Iron-on patches are designed to be long-lasting, but they can usually be removed with heat if needed.
Key Takeways
Iron-on patches remain one of the easiest ways to mark something as completely yours without the need for any complicated equipment. Once you know how to apply them properly and how to look after them, they’ll stay strong through a lot of wear. And when one eventually needs fixing, you’ve successfully learned a lot above to sort it out without starting from scratch.

As a fashion designer at Iron On Patches UK, I help businesses and people create custom iron-on patches. I help them with what I know about designing patches and what materials to use. I also talk about how to apply patches to different things and what’s popular in the patch world. My goal with the Iron-On Patches UK blog is to help people make premium patches that show their unique identity and how these patches can be a part of their brand. The Iron-On Patches UK blog is here to make it easy for people to customize their patches.