
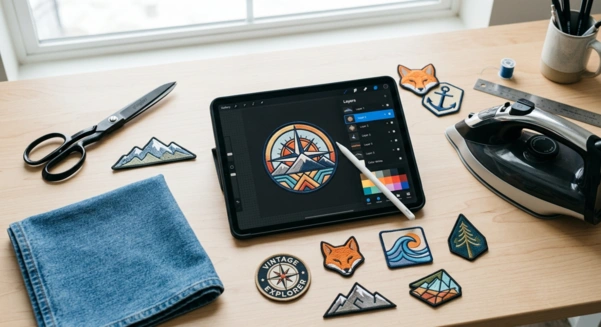
How To Design Your Custom Iron-On Patches Like A Pro
Creating a custom iron-on patch sounds simple until you actually sit down to design one. Suddenly, questions start piling up. Should the artwork be detailed or minimal? Which colours will stitch well? What shape will look best once it’s attached to a jacket or a backpack?
The great part is that you don’t need to be a graphic designer to create a patch that looks professional. A few smart design decisions at the beginning can make the difference between a patch that gets noticed for the right reasons and one that doesn’t translate well into embroidery.
Keep reading to know how to turn an idea into something you’ll be proud to wear.
Iron-On Patch Design Guide
Custom patches are a fun choice for decorating your products. Here is how you can customise them with a unique touch.
Start With the Purpose
A lot of people open a design app before they’ve decided what their iron on patches are actually for.
You need to be clear regarding the following things at first.
- Who will wear it?
- Where will it be attached?
- Is it meant to promote a brand or simply look stylish?
- Will it be worn every day or only occasionally?
A company logo for staff uniforms will need a different approach from a commemorative patch created for a football tournament.
Keep the Artwork Simple
As a first-time designer, you should avoid trying to create a design that includes too much.
Embroidered patches have physical thread limitations when compared with printed patches. Extremely fine lines and complex illustrations often disappear once they’re stitched.
Imagine viewing your design from a few metres away.
Can you still recognise it?
If the answer is no, simplify it.
A strong patch usually contains:
- One clear focal point
- Easy-to-read text
- Bold outlines
- Limited small details
You will notice that most of the memorable patches rely on clean shapes rather than complicated artwork.
Choose Colours That Work Together
Colour is often the first thing people notice and this is why you should think about contrast. Good contrast helps important parts of the design stand out.
Dark thread on a dark background can become difficult to distinguish, while bright colours placed next to one another sometimes compete for attention.
If your patch represents a business, try to stay consistent with existing brand colours as it creates a more recognisable identity.
Consider Where the Patch Will Be Worn
Your design decisions should reflect how the patch will actually be used.
If you are planning to customise a denim jacket with iron-on patches, you will have more freedom to experiment with layered designs and larger patch sizes.
More examples include:
- A logo worn on work uniforms should remain readable from a distance.
- A festival patch can prioritise creativity.
- Motorcycle club patches can enjoy large lettering because visibility matters while riding.
- Cheerful artwork without excessive detail looks great on children’s clothing.
Just make sure to think about the finished product rather than just the artwork for better design decisions.
Pick the Right Shape
You don’t always need to choose a circle because it’s familiar.
There’s nothing wrong with that, but it’s worth exploring other options.
You can create different impressions with shapes such as
- Circles that suit club badges and logos.
- Shields that create a traditional appearance.
- Rectangles which work well for names and ranks.
- Ovals that provide extra room for wording.
- Custom-cut borders which allow unique designs to stand out.
Think about how your patch will look once attached to clothing rather than asking which shape looks best on screen.
Think About Size Before Finalising the Design
A design that looks perfect on a computer monitor may feel completely different once it’s stitched onto a sleeve.
That’s why experienced designers usually decide the patch size early in the process.
As a rough guide:
- Chest logos usually remain fairly compact.
- Backpack patches can be noticeably larger.
- Jacket back patches often allow far more creative freedom.
Printing the design on paper before production is an easy way to judge whether the proportions feel right.
Fonts Matter More Than Most People Expect
The text you are using should support the design, not fight against it.
A decorative font can look attractive online, but can become difficult to read when embroidered.
Remember, clean lettering usually produces the best results. Names and short phrases generally stitch much more clearly than long sentences.
Decide on the Border Style
Borders do more than frame the artwork.
They also influence durability and appearance.
- Merrowed borders remain popular because they create a traditional embroidered edge with excellent durability.
- Laser-cut or heat-cut borders allow more unusual shapes and intricate outlines.
The right choice depends on the style you’re trying to achieve.
Choose the Right Iron-On Backing
As a patch enthusiast, you should be aware of creative ways to style and care for custom iron-on patches.
The design may grab attention, but the backing determines how well the patch performs once it’s applied.
Iron-on backing remains popular because it’s quick and suitable for most everyday garments.
Once heat is applied correctly, the adhesive forms a strong bond with the fabric.
That said, think about how the item will be used.
You need to reinforce the edges with a few stitches after ironing if the patch will be attached to clothing that’s washed frequently or worn outdoors. It only takes a few minutes and can extend the life of the patch considerably.
Some people also choose hook-and-loop backing for uniforms or sew-on backing for garments that can’t tolerate high heat.
Prepare Your Artwork for Production
Once you’re happy with the design, it’s worth taking a final look before sending it to the manufacturer.
Ask yourself:
- Is every line clear?
- Can the text still be read when the patch is reduced in size?
- Are any details so small that they could disappear during embroidery?
- Do the colours still stand out when viewed from a distance?
If possible, save your artwork as a high-resolution vector file such as AI, EPS, or SVG. These formats allow manufacturers to scale the design without losing quality. If you don’t have access to vector software, a high-resolution PNG can often be converted before production.
Common Queries Answered
-
Can I design an iron-on patch without graphic design experience?
Of course! Many manufacturers offer free design support that helps turn rough sketches into production-ready artwork. Even a hand-drawn concept can often be refined into a professional patch.
-
How long does it usually take to receive custom iron-on patches in the UK?
Production times vary between suppliers, but most UK orders are completed within a few weeks after the design proof has been approved.
-
Can I order just one custom iron-on patch?
A lot of UK manufacturers now offer low minimum orders, and some even produce single custom patches, which makes them ideal for personal projects or sample designs.
Wrapping Up
Designing your own custom iron-on patch is as much about clear thinking as creative ideas. A simple design with strong colours and the right proportions will usually outperform one that’s overloaded with detail. So take time to define the purpose and keep the artwork clean before production begins. These small decisions have a lasting impact on how the finished patch looks and performs!

As a fashion designer at Iron On Patches UK, I help businesses and people create custom iron-on patches. I help them with what I know about designing patches and what materials to use. I also talk about how to apply patches to different things and what’s popular in the patch world. My goal with the Iron-On Patches UK blog is to help people make premium patches that show their unique identity and how these patches can be a part of their brand. The Iron-On Patches UK blog is here to make it easy for people to customize their patches.